Key Takeaways
- Specify 18/8 stainless steel at 0.45-0.55 mm wall thickness for most promotional thermos programs
- Vacuum failure is best controlled with 100% leak testing plus sampled heat-retention testing under AQL
- Logo durability depends on coating, artwork size, and whether you choose laser, silkscreen, UV, or heat transfer
- Retail-ready distributor thermos orders need carton drop tests, barcode checks, and packing specs before deposit
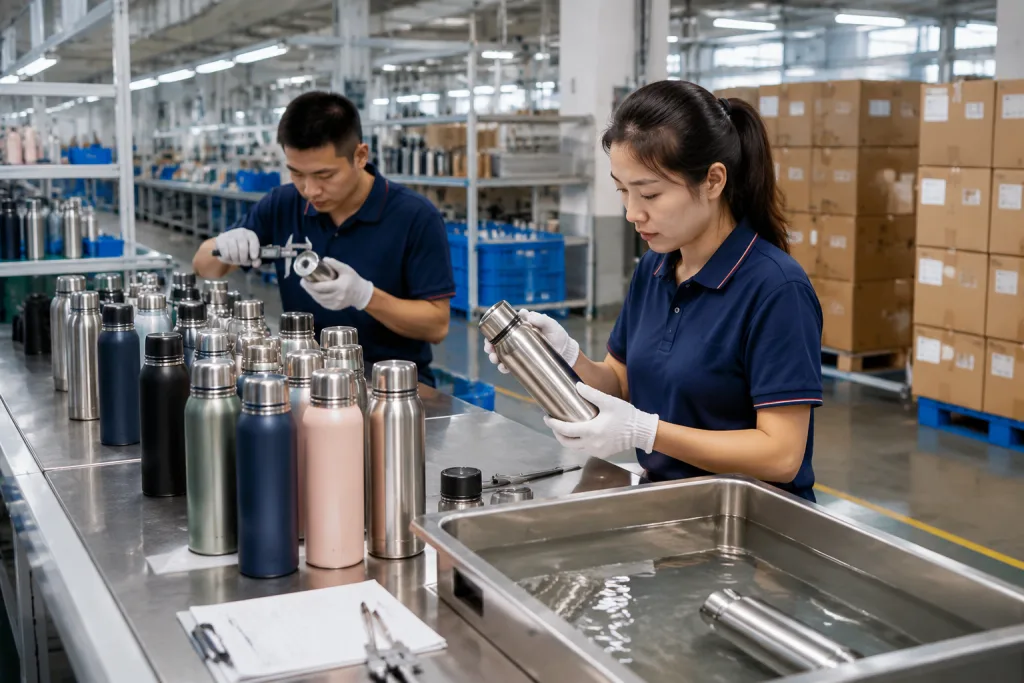
A top promotional thermos bottle usually fails in boring ways: a lid weeps after the 24-hour inverted leak test, the powder coat chips when QC runs a 3M tape pull, or the logo looks fine on the golden sample and sits 2 mm off-center on 5,000 units. Small stuff. It gets expensive when your outdoor retailer or campaign client rejects cartons already landed in Rotterdam, Hamburg, Toronto, or Seattle.
If you are buying bulk thermos orders from China, asking for a nicer photo is the wrong question to ask. Spec the failure points first. BottleForge Industrial in Hangzhou, Zhejiang builds stainless vacuum bottles for promotional brands and outdoor retailers. We run a Zhejiang line that can produce 300,000 stainless units/month, with typical MOQ from 1,000 pieces per color and 30-45 days lead time after artwork approval; last month a buyer flagged a PO typo on Pantone Black C before we opened the paint drums, which saved the order.
Steel Substitution Starts Quietly
The first failure mode is not rust on day one. It starts in the quotation line that says “stainless steel” but never fixes the grade, thickness, or food-contact surface. We see this on about 6 out of 20 RFQs for custom thermos projects. For a custom thermos sold through outdoor retailers, the inner wall should normally be 18/8 stainless steel, also written as SUS304. For price-driven promotional thermos orders, some factories quote 201 stainless on the outer wall. Fine, if it is declared and legal in your market. The inner drinking surface cannot be vague. QC pulled one pre-production sample last year with SUS304 on the sample tag, but the PMI gun read 201 on the liner rim.
Ask for material grade by component: inner liner, outer shell, lid insert, tea strainer, metal trim with the exact plating or stainless grade called out. For most top promotional thermos bottle programs, we recommend 0.45-0.55 mm steel wall thickness on the body. Go thinner and dent rates rise during ocean freight and retail handling; we have counted 38 dented bodies in a 500-piece drop-carton check after the line ran 0.38 mm by mistake. Go heavier and your landed cost climbs fast, especially on 750 ml and 1,000 ml bottles. The math doesn’t work when the buyer wants a low promo price and a heavy retail-grade shell.
The practical spec is short: SUS304 inner wall, passivated surface, no copper exposure inside the drinking path, plus LFGB or FDA food-contact documentation based on destination. For Europe, add REACH and LFGB migration testing where needed. For North America, confirm FDA food-contact compliance and, for children’s items, CPSIA and ASTM requirements if applicable. On our side, we run a 24-hour warm water soak and check the weld seam under a 10x loupe before sending approval photos. Simple checks catch ugly problems.
Do not accept “same as sample” as the material spec. This is the wrong question to ask, because a sample can be made from better steel than mass production and still look identical on a buyer’s desk. Put the material table in the proforma invoice and inspection checklist. We once caught a PO typo that changed “SUS304 inner” to “SS inner” before deposit; that small wording would have left too much room for substitution. A serious thermos manufacturer in China will not object to that. A weak thermos vendor may suddenly go quiet.
Vacuum Loss Hides Until Delivery
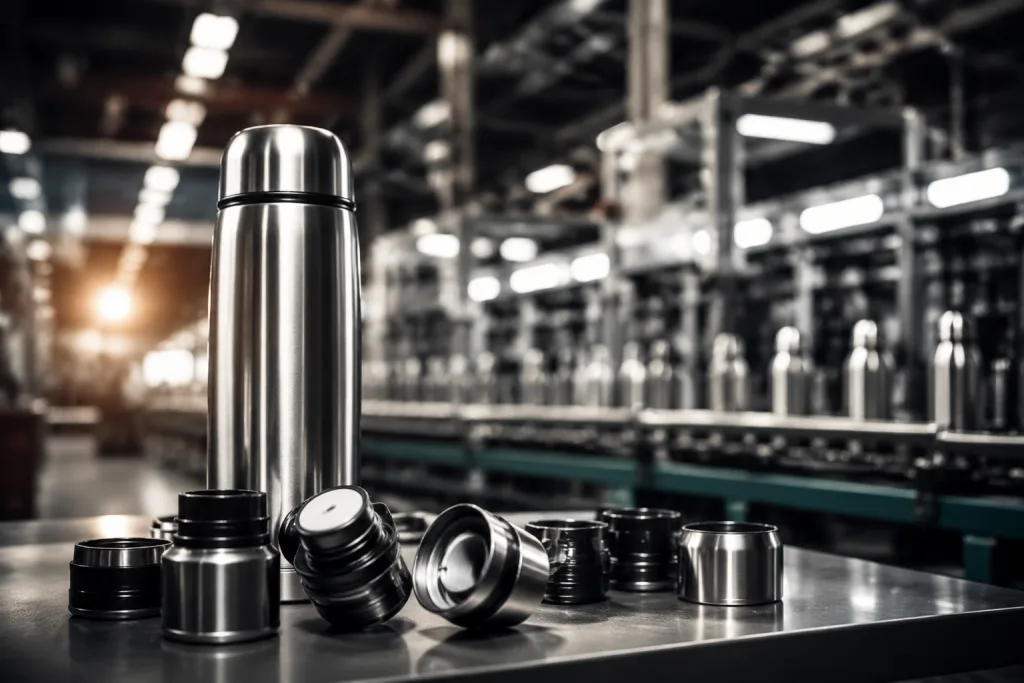
Vacuum insulation is where a thermos factory earns the reorder or eats the claim. A double-wall stainless thermos needs a clean laser weld, steady vacuum extraction, and a base seal that survives filling, capping, and carton drop. Looks fool buyers. We have seen bottles pass the appearance table under a 600 lux lamp, then fail heat retention because the vacuum tail at the base was not sealed cleanly. The buyer flags it only after coffee drops to lukewarm in 2 hours instead of 6.
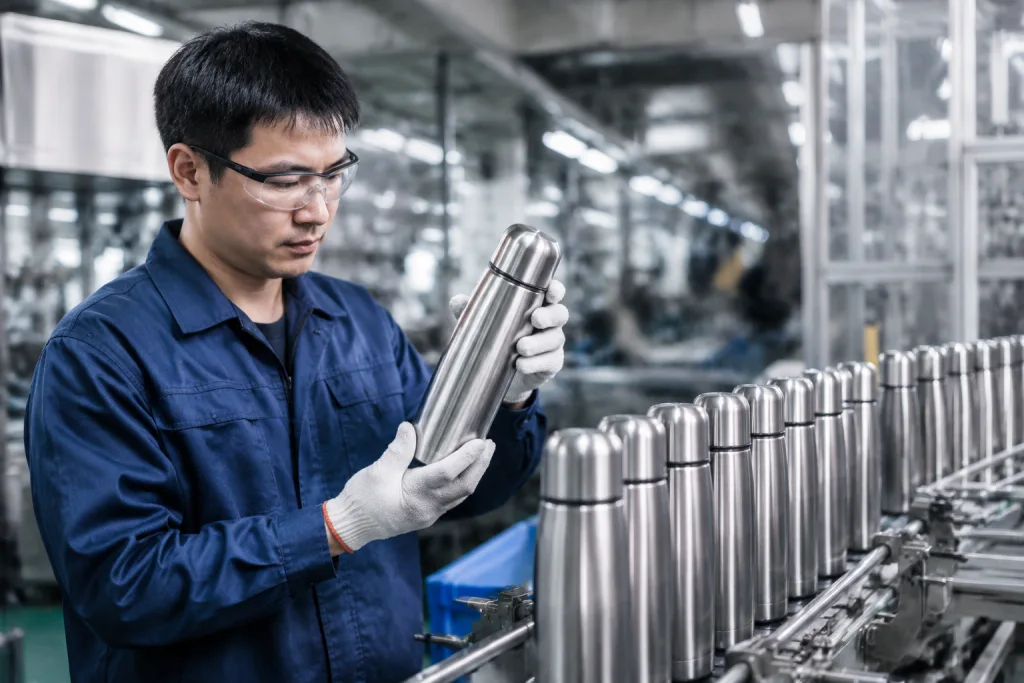
For a customized thermos program, lock the heat-retention test before you sign the golden sample. We run the usual commercial check with 95°C water, filled to nominal capacity, at 20°C ambient temperature, with the probe sitting 20 mm below the water surface. For a 500 ml bottle, you might require ≥60°C after 6 hours and ≥45°C after 12 hours. A 750 ml bottle usually holds heat better because it has less surface area per milliliter of water. Do not compare shapes blindly. A wide-mouth 1,000 ml outdoor bottle and a slim 350 ml commuter bottle are not playing the same game; this is the wrong question to ask if the buyer only says “same insulation, right?”
At BottleForge, every vacuum bottle passes a leak check, and heat-retention performance is sampled by batch under an AQL plan. QC pulled the sample from line 3 last month after one carton showed water marks near the base cup, and we held 1,200 pcs until the vacuum station records matched the inspection sheet. For large thermos bulk orders, you can request tighter sampling or 100% insulation screening, but the math changes: screening 10,000 pcs can add 1 to 2 production days, depending on bottle size. A practical inspection level is AQL 2.5 for major defects and AQL 4.0 for minor defects, with critical defects at 0. Leakage, failed vacuum, sharp edges, and contaminated interiors belong under critical or major, not cosmetic.
If your suppliers thermos quote is 12% below the market, ask how they control vacuum failure. If the answer is only “we have QC,” push back. We have seen this go sideways. Ask for weld parameters, vacuum testing records, and random retention test photos with time stamps; one buyer once sent us a PO with “12h ≥ 65°C” typed by mistake for a 350 ml slim bottle, and the line stopped until we corrected the spec in writing.
Lids Leak More Than Bodies
Buyers often blame the bottle body when water leaks. On our line, 7 out of 10 leak complaints start at the lid. A promotional thermos might ship with a screw lid, push-button lid, flip straw lid, cup lid, or sports cap, and each one fails in a different place. We see silicone gaskets roll out of the groove by 0.5 mm, thread flash left near the parting line, push buttons sticking after 20 dishwasher cycles, and straw vents dripping when QC turns the sample upside down in a backpack test jig.
For outdoor retail orders, approving a lid by looks is the wrong question to ask. Ask for a 360° inversion leak test for 30 minutes, a shake test with colored water, and a thread torque check with a digital torque meter. For a screw cap, the gasket should seat cleanly after repeated opening, not just on the first sample. For a push-button lid, we run at least 50 open-close cycles on sample units before mass production. If the bottle will be sold for hiking or school use, assume the user will drop it from 1 meter, overfill it by 10 mm, and throw it sideways into a bag.
Lid material matters too. Specify food-grade PP or Tritan where the design needs it, silicone gasket hardness around 50-60 Shore A for many sealing applications, and no sharp plastic smell after a 95°C hot-water soak for 2 hours. For EU distribution, request LFGB or relevant food-contact test reports for plastic and silicone parts, not only for stainless steel. For North America, make sure the thermos supplier can provide FDA food-contact declarations for every drinking-path component; we had one buyer flag a report once because the PO said “sillicone” and the lab file said “silicone.”
A thermos factory may offer five lid options for the same body. Do not pick the cheapest cap by habit. On a 5,000-piece distributor thermos order, saving USD 0.18 per lid looks nice on the quote sheet, but the math does not work if 3% of units leak. That is 150 complaints before the season starts. Replacement bottles, air freight, and one angry key account cost more than the better lid, and we have seen this go sideways after QC pulled only 13 leaking pieces from the first carton check.
Coating Chips Kill Retail Confidence
Powder coating is where a custom thermos starts to feel like a real brand SKU, and it is also where a low quote usually hides the shortcut. A matte black bottle looks sharp in a render; after 7 days on a peg hook, QC may find chips around the base ring from shelf rub. We see the same causes on the line: weak phosphating or zirconium pretreatment, coating under 50 microns, oven dwell time cut short, dust from polishing left on the shell, and poor bite around weld lines or rolled lips. Small chips kill trust fast.
For a top promotional thermos bottle, write the finish type and test method into the PO, not just “matte black.” Powder coating should pass a cross-hatch adhesion test, commonly ASTM D3359, with the rating agreed before mass production. We run a 3M tape pull test, a 50-cycle abrasion check on the base, and visual inspection under the same light booth each time. For outdoor retail, our usual powder coat thickness is 60-90 microns, checked with an Elcometer gauge at the body, shoulder, and bottom edge. Too thin chips. Too thick brings orange peel, thread drag, or a lid that feels tight after assembly.
Color control needs numbers, not screenshots. If you use Pantone references, stainless steel, powder coating, and plastic caps will never bounce light the same way. For large thermos promotional campaigns, approve one physical color chip or one pre-production sample under D65 lighting before we open the full batch. A Delta E tolerance of 1.5-2.0 is workable for most solid colors; metallic and translucent finishes need more room, and this is where buyers sometimes push too hard. The math does not work if the cap, body, and logo all use different materials but must “match exactly.”
China has 200+ bottle coating lines, but they do not all run the same pretreatment. In Zhejiang, we get steadier results when one factory controls polishing, alkaline washing, spraying, and curing under one production plan instead of sending shells to three subcontractors. We have seen this go sideways: one PO even said “satin balck,” the buyer meant matte black, and the coating shop sprayed the wrong texture on 3,000 units before QC pulled the sample. If you need a premium customized thermos, ask whether coating is in-house, what curing temperature and dwell time are used, and how many units are checked per batch.
Logos Fail From Bad Assumptions
A customizable thermos does not become a durable branded product just because the logo file looks good. The logo process has to fit the surface and the job size. Laser engraving is clean and permanent on 304 stainless or powder-coated shells, but it normally shows the base metal color, so your red-and-blue mascot will turn into a single silver mark. Silkscreen works for one or two solid colors and we run it often for 1,000–5,000 pcs orders, but a curved bottle needs a proper aluminum jig and a 3–5 mm safe gap near the seam. UV print handles color and gradients better. Test it first. QC pulled one black matte sample last month after the 3M tape test lifted the corner of a UV logo. Heat transfer can look sharp, but the edges lift when the coating and adhesive do not bite together.
For promotional brands, the common mistake is approving artwork on a flat PDF. This is the wrong question to ask. Ask your thermos manufacturer for a print-area drawing showing diameter, taper, seam location, and safe margins. On a 500 ml bottle, a 60 x 80 mm logo may sit comfortably; a full wrap on a tapered body needs distortion compensation, or the circle logo becomes an egg shape after printing. We usually check this with a paper wrap and caliper before the line opens. If your campaign uses a QR code, test scanability after printing. A 12 mm QR code may scan on a proof and fail after powder texture or glare is added, and we have seen buyers flag this only after 200 pcs were already packed.
Define logo inspection criteria before mass production. List misalignment over 2 mm, wrong Pantone color, pinholes, scratches through print, and incomplete laser marks as defects. AQL 2.5 is not magic if the defect wording is loose. For a thermos custom order above 3,000 pieces, approve a pre-production sample made on the actual production line, not only a hand-made sample from the sample room. We ship PP samples with the same jig, same ink batch, and same curing time because the math does not work when a perfect sample-room logo meets a faster production line.
If you are comparing thermos manufacturers, ask for photos of failed logo tests, not just perfect catalog shots. Ask to see the tape-test failure, the rubbed silkscreen, or the laser mark that came out too shallow at 35W. A factory willing to show limits is usually safer than suppliers thermos teams promising every decoration method works on every coating. We have seen this go sideways: one buyer sent a PO with “UV full wrap” typed as “U full wrap,” and nobody caught it until the sample label was printed.
Packing Breaks Good Bottles
A good bottle can leave the line perfect and still reach the buyer unsellable if packing gets pushed to the last 30 minutes. We’ve had QC pull a 500 ml powder-coated sample with a clean body, then find lid scuffs after a 12-hour carton compression stack because the insert sat 3 mm too low. Dents, rubbed lids, crushed gift boxes, missing FNSKU labels, and mixed colors inside cartons are not “small packing issues.” They kill repeat orders. The buyer flagged it before the bottle even reached the shelf.
Start with the sales channel. Retail shelf orders usually need an individual color box with EAN/UPC barcode, warning text, recycling marks, country-of-origin marking, and multilingual use instructions printed in the right panel sequence. Amazon FBA is stricter on FNSKU labeling, carton weight limits, suffocation warnings for polybags, and drop-test resistance; one typo on a PO, “FNKSU” instead of “FNSKU,” delayed label artwork approval by 2 days on a May order. Event giveaways can ship in a plain white box, but the lid still needs protection from shoulder rubbing, usually a PE bag plus a 1.5 mm cardboard neck guard. Cheap packing is the wrong place to save 4 cents.
Specify carton packing in numbers: 24 pieces per master carton for many 500 ml bottles, 5-ply export carton, gross weight under 15 kg where possible, and dividers or molded trays if the finish is high value. We run the 76 cm drop test on one corner, three edges, and six faces before release, then open the carton with a utility knife and check the lid edge under the packing lamp. If gift boxes crush during that test, ocean freight will not be kinder. We’ve seen this go sideways: a glossy gift box passed visual inspection on the table, then failed after the second edge drop because the E-flute board was 0.4 mm thinner than approved.
For FOB Ningbo or FOB Shanghai shipments from Zhejiang, carton dimensions affect freight cost before anyone talks about sea rate. A gift box oversized by just 8 mm on two sides can reduce container loading by 8-12%, and the math doesn’t work when the buyer ordered 18,000 pieces for a fixed promotion date. Your factory thermos quote should include estimated carton size, CBM, net weight, and gross weight before you issue a purchase order. Ask for the carton drawing too; we ship cleaner when the buyer signs off on the 5-ply carton size before mass packing starts.
Inspection Plans Need Teeth
The last failure mode is treating inspection like one gate at the warehouse door. Too late. By then, cartons are strapped, the ETD is 3 days away, and the merchandiser is asking whether “small logo drift” can pass. A workable plan sets control points at sample approval, incoming materials, first production, inline inspection, and final random inspection, with calipers, vacuum testers, and barcode scanners already named on the checklist.
For a manufacturer thermos order, ask for a golden sample signed by both sides, photo-sealed, and kept in the sample room with the PO number on the tag. During first production, we check steel grade documents, body weight on a 0.1 g scale, lid fit, coating color, logo position, and packaging layout. Inline inspection should start once 20-30% of goods are finished; at that point the line can still adjust a spray gun, change a pad-printing jig, or pull 600 lids before the mistake spreads. Final inspection should happen when 100% of goods are produced and at least 80% packed.
Your AQL checklist should split defects into critical, major, and minor, not bury everything in one soft “appearance issue” bucket. Critical defects include leakage, failed vacuum, sharp burrs, unsafe odor, contamination, and wrong food-contact material; QC pulled one sample last year with a burr inside the mouth rim that cut the nitrile glove. Major defects include obvious dents, wrong logo, poor coating adhesion, non-scanning barcode, and missing accessories. Minor defects include small dust points, slight color variation within tolerance, and tiny packaging scuffs, as long as the approved limit is written in mm or Delta E, not guessed at the packing table.
At BottleForge Industrial in Hangzhou, China, we prefer buyers to send a clear QC checklist before deposit. It makes the quote cleaner. A supplier thermos project with strict inspection may cost USD 0.10-0.35 more per unit than a loose one, depending on the testing burden and packing complexity; the math doesn't work if the buyer asks for 6 extra checks but still wants the same EXW price. That is still cheaper than air-freighting replacements after your distributor thermos customer opens the first pallet and flags leaking cups, crushed color boxes, or a PO typo printed on 5,000 hang tags.
Send your thermos spec before you buy blind
Share capacity, logo, market, target price, and launch date. We will flag the production risks before quoting your custom stainless thermos.
Frequently asked questions
What MOQ should I expect for a top promotional thermos bottle?
For most stainless custom thermos projects, a realistic MOQ is 1,000 pieces per color for standard bodies and standard lids. If you need a private mold, new lid tooling, or a non-standard coating, MOQ usually moves to 3,000-5,000 pieces because tooling, setup, and color-line cleaning need to be amortized. Mixed colors can work, but each color should be treated as a separate production batch for coating control. For a first promotional thermos order, 1,000-2,000 pieces is usually enough to validate your market without creating excessive inventory risk.
How much does a stainless bulk thermos usually cost FOB China?
A standard 500 ml stainless vacuum bottle typically ranges from about USD 3.20-6.50 FOB Ningbo or Shanghai, depending on steel thickness, lid design, coating, logo method, packing, and testing requirements. A simple one-color silkscreen logo and white box sits near the lower end. A premium powder-coated bottle with laser logo, color box, booklet, barcode labeling, and tighter QC moves higher. Large thermos bulk orders above 10,000 pieces can reduce unit cost, but only if the specs are stable and the production line does not need frequent color or artwork changes.
Which logo method is safest for an outdoor retailer thermos?
Laser engraving is usually the safest for durability because it does not rely on ink adhesion. It works especially well on powder-coated stainless bottles where the mark reveals the metal or base layer underneath. For full-color brand artwork, UV print or heat transfer can be used, but you should test adhesion, abrasion, and dishwasher exposure if the product claim mentions dishwasher safety. For most outdoor retail programs, we recommend laser for permanent branding and silkscreen for simple one- or two-color promotional logos. Always approve a production-line sample before mass production.
Can a thermos supplier certify products for Europe and North America?
Yes, but you should define the exact destination market. Europe may require LFGB food-contact testing, REACH compliance for coatings and parts, and packaging markings such as recycling symbols. North America usually focuses on FDA food-contact compliance, and children’s drinkware may need CPSIA and ASTM checks. A reliable thermos supplier can provide existing reports for common materials, but new colors, inks, silicone, or plastic components may need fresh testing. Budget 7-12 working days for lab testing if reports must be issued for your exact SKU and artwork.
How long does a customized thermos order take from artwork approval?
For standard models, allow 30-45 days production after deposit, artwork approval, and sample confirmation. Add 7-10 days if you need a pre-production sample shipped internationally before mass production. Custom mold development can take 45-75 days before production starts, depending on lid complexity and tooling revisions. Sea freight from China to Europe or North America often adds 25-45 days port-to-port, plus customs and inland delivery. If your promotional campaign has a fixed launch date, lock the specification at least 90 days before the in-store or event deadline.