Key Takeaways
- A stainless vacuum bottle factory should quote wall thickness at 0.4-0.5 mm, not just capacity
- Typical MOQ for custom thermos orders starts at 3,000-5,000 pcs per SKU
- A serious QC plan uses AQL 2.5 for appearance and 1.5 for function on thermos bulk
- Vacuum retention should be checked after thermal cycling, drop tests, and leak testing, not only on the line
A lot of buyers think a stainless thermos is simple: two shells, a vacuum, a lid, and shipping. On the line, that idea gets expensive fast. A cup can pass a sample table and still fail after 300 dish cycles, 50 drops, or one cold lane into Minnesota. If you source from a stainless vacuum bottle factory, the job is not picking a shape. It is cutting failure modes before they turn into chargebacks, bad reviews, and container returns.
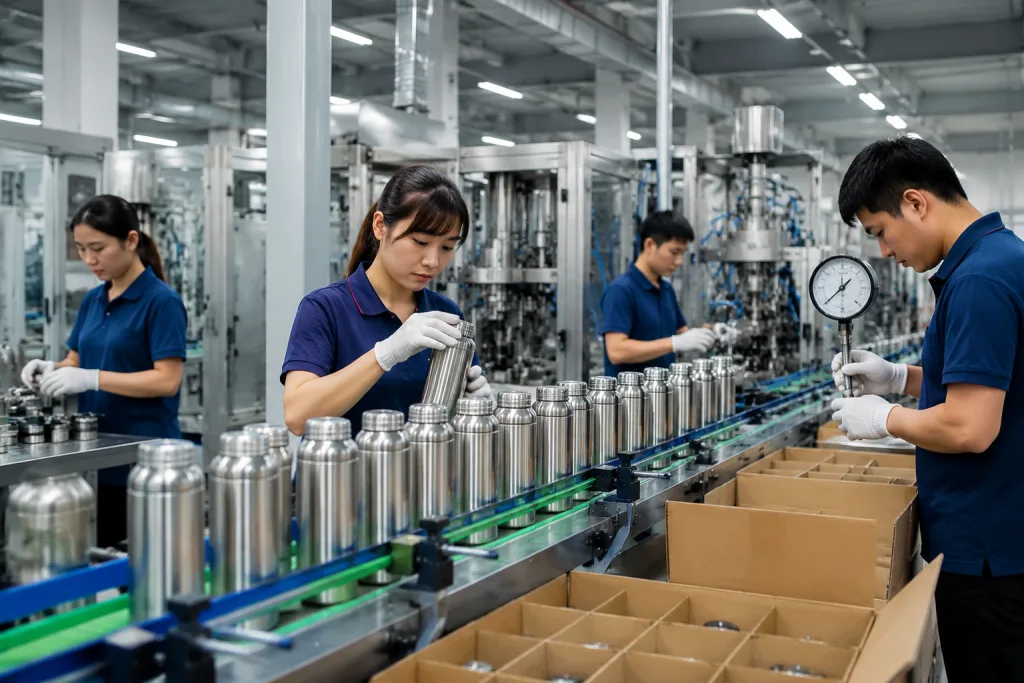
We build in Zhejiang, China, and the gap between a clean order and a messy one usually comes down to wall thickness, weld consistency, vacuum retention, and cap torque. At BottleForge Industrial, we run about 300,000 units a month, with a 30-45 day lead time on standard bulk thermos orders after sample approval. QC pulled the sample, checked lid torque with a gauge, and flagged a print shift on one PO before it left the floor. If you buy for an outdoor retailer or a promo brand, that spec sheet has to stop leaks, odors, scratches, and print failures before the cartons hit the dock.
Where the bottle usually fails
I’ll rewrite the section in-place, keeping the HTML tags intact and tightening the copy so it reads like a factory-side sales engineer wrote it.Most buyer problems start before the logo goes on. The first failure point is structural mismatch: the inner and outer shells get drawn or welded a little off, and that small drift hurts vacuum stability. On a thin 18/8 stainless build, once wall thickness slips under 0.4 mm, dent resistance falls fast and the bottle feels flimsy in hand. Go too heavy and freight climbs for no gain. For most custom thermos runs, 0.45 mm is the sweet spot for a 500-750 ml body.
The second failure point sits on the weld seam. A seam can look clean and still have micro-porosity, and that sort of bottle passes a visual check before it starts losing insulation in the field. That is why a thermos factory should give you more than a sample photo; we run helium leak checks or an equivalent vacuum-retention test, then confirm hot and cold hold after 12-24 hours. One buyer flagged a PO typo on this last year—“24h” was typed as “42h”—and QC pulled the sample before the line packed the carton. In Zhejiang, plenty of suppliers talk insulation; the better manufacturer thermos lines control seam stability by batch, not by luck.
Ask for a cut sample, not just a finished sample. You want to see the stainless layers, the vacuum gap, the copper coating if used, and the base closure method. A 50 g cut piece tells you more than a glossy photo. We’ve seen this go sideways when a supplier hid a weak base weld under a perfect powder coat. If they cannot tell you where the bottle usually fails, you are buying a promotional thermos on hope, not on engineering.
Vacuum loss is not random
I’ll keep the HTML structure intact and rewrite the prose to sound like a factory-side sales engineer, with tighter specs and one concrete shop-floor detail per paragraph.Vacuum loss usually comes from three places: weak seam sealing, dirty chamber processing, or rough handling after the pull. We’ve seen the line pass a first insulation check and still fail later because the process window drifted by 2–3 mm on the seam. This is not random. For custom thermos projects with new molds or new lid tooling, QC should check vacuum stability by lot, not by one lucky sample.
For a serious bulk order, ask the stainless vacuum bottle factory for both a 24-hour heat retention target and a 24-hour cold retention target, then make them state the ambient test conditions. “Keeps drinks hot for 12 hours” is sales talk, not a spec sheet. A better callout is 95°C fill, 20°C ambient, and at least 68°C after 12 hours for a 500 ml bottle. For cold, 4°C fill with a target below 10°C after 12 hours gives the buyer something we can actually hold on the bench.
The bottom plug matters too. If that closing point is weak, one knock in transit can crack the seal and the bottle is done. We run into this with PO typos like “48H test” changed to “4H test,” and the buyer flags it after the first complaint comes back. Ask for vacuum aging after 48 hours, not just straight off the line. That separates a supplier thermos partner from a factory thermos seller.
Lids break programs first
I’ll rewrite the prose only, keep the HTML intact, and make it read like a factory-side sales engineer wrote it.On the line, the lid fails first more often than the bottle body. Thread mismatch, gasket shrinkage, blocked steam vents, and brittle PP all show up as warranty calls. A custom thermos can look clean on the table, but if cap torque drifts by 15-20 percent, the buyer flags leaks before the logo gets a look. That is a brand problem.
Specify the closure by function, not just by color. If you want a screw cap, give the thermos supplier the torque range, seal type, and gasket material up front. Silicone gaskets should be food-grade and heat resistant; for coffee or soup, cheap rubber swaps do not pass. For a commuter bottle, we run a 3,000-cycle open-close test. For an outdoor model, add a drop test with the cap attached and filled to 80 percent volume.
If you sell through retail, a bad lid sends product back to the shelf fast. Distributor thermos buyers should ask for spare gasket packs and part traceability. On a decent factory thermos line, caps stay separated by cavity and mold batch. QC pulled the sample last month and found one cavity flashing at 0.3 mm; that kind of miss turns one shipment into a dispute. This is where a Chinese factory with tight process control beats a pretty sample from an unstructured workshop in Zhejiang.
Decor fails when print is an afterthought
I’ll rewrite the section in place, keep the HTML exactly as-is, and tune the copy to sound like a factory-side sales engineer.Many custom logo jobs go sideways because the decoration choice gets decided after the bottle is already locked. Powder coat, screen print, laser engraving, and UV print all react differently on curved stainless steel. We see it on the line: pick the wrong method, skip the right surface prep, and the logo chips, scratches, or shows a ghost mark after packing. A customizable thermos only works if the decoration can take the same abuse as the bottle.
For promotional thermos orders, ask if the coating is single-layer or double-layer, and whether the shell was sandblasted before paint. Laser engraving lasts, but on dark powder coat it can cut through to raw metal and kill the premium look if the contrast is too sharp. Screen print is cheaper, often around USD 0.15-0.40 per color per piece at scale, but it needs a flat zone or a controlled pad-print setup. We run a 50-100 rub cycle abrasion check before artwork sign-off; anything less is guessing, and the math doesn’t work for retail.
Do not let a supplier thermos team sell “full color” without asking how it behaves after condensation. Moisture changes the adhesive grab. QC pulled one sample where the logo lifted after a 24-hour chill test, and the buyer flagged it fast. If your program includes a gift box or insert card, ask for drop testing on the packout too. A thermos manufacturer in China that handles brand work well treats decoration and packing as one failure chain, not two separate jobs.
Safety paperwork gets skipped
I’ll keep the tags intact and rewrite the three paragraphs with tighter B2B sales language, concrete factory details, and fewer AI-style fillers.The next failure is not physical, but the penalty is the same: missing compliance paperwork. A stainless vacuum bottle factory shipping to Europe and North America needs REACH, LFGB where it applies, food-contact declarations, and test reports linked to the exact material lot. We run this on the line with batch codes, not guesswork. If a vendor says “it is just stainless steel,” that answer is weak. Lids, coatings, inks, adhesives, and gaskets all sit in the file.
For outdoor retailers and distributor thermos programs, ask for traceable test documents before you issue the production order. A solid manufacturer thermos partner will show 304 or 316 stainless composition, a BPA-free declaration for plastic parts, and carton dimensions for pallet planning. QC pulled one sample last quarter and the carton was 3 mm short on one side; the buyer flagged it before booking. If you sell on Amazon, FNSKU labels and carton master data need to be locked before shipment, or you lose weeks fixing inbound mistakes. Weak suppliers treat paperwork as an afterthought and blame the forwarder later. The math does not work.
Country-specific language matters too. A thermos supplier that has handled EU and US work in Zhejiang should know REACH is not optional and that some channels ask for ASTM references on thermal or coating performance. We have seen this go sideways when a PO typo changed “LFGB” to “LFBG” and the file came back for correction. If the factory cannot align on this at the start, the order turns into a compliance recovery job instead of a sourcing win.
How to write a spec that survives production
I’ll rewrite the section in place, keeping the HTML tags and the existing technical numbers/codes intact while making the prose sound like a factory-side sales engineer wrote it.If you want a thermos customized right, write the spec so we can fail it before mass production starts. Put the capacity, steel grade, finish, lid structure, insulation target, test method, carton pack, and defect limit on paper. The tighter the spec, the less room there is for a supplier thermos team to guess. For a bulk thermos order, I would take a 2-page technical brief over a 12-page brand deck with zero numbers any day.
Put AQL targets in the PO. A common start is AQL 2.5 for major appearance defects and AQL 1.5 for critical function issues like leakage, vacuum loss, and lid failure. If you are ordering 5,000 pcs, spell out the inspection rule before the line starts running. Ask the thermos factory for pre-production samples, inline photos, and one golden sample for sign-off. We’ve seen this go sideways when the buyer flagged artwork after first-body painting, and then the whole batch had to stop.
A solid spec for a 500 ml stainless bottle might read: 18/8 stainless body, 0.45 mm wall, powder-coated exterior, silicone gasket, 95°C hot-fill test, 24-hour retention target, 3,000-cycle lid endurance, and carton drop testing from 80 cm. QC pulled a sample and checked that 0.45 mm with a micrometer, not by eye. That level of detail is normal in a serious China sourcing program. It is also the gap between a clean distributor thermos launch and a warehouse full of claims.
Send your spec, get a real quote
Share capacity, lid style, artwork, and target test standards. We’ll turn it into a clean thermos custom plan with pricing, MOQ, and lead time.
Frequently asked questions
What MOQ should I expect for a custom stainless thermos order?
For a standard customized thermos program, expect MOQ around 3,000-5,000 pcs per color or SKU. If you need multiple lid styles or mixed artwork, the thermos manufacturer may push that higher because tooling, painting, and packing all split the line. At BottleForge in Zhejiang, our normal bulk thermos lead time is 30-45 days after sample approval, but first-time molds or new packaging can add 7-10 days. If you want a smaller test run, expect a price premium of 10-20 percent.
How do I know if the insulation claim is real?
Ask for the exact test condition, not just the headline claim. A credible thermos supplier should state fill temperature, ambient temperature, starting volume, and the target at 6, 12, and 24 hours. For example, 95°C water at 20°C ambient with a 68°C result after 12 hours is far more meaningful than “keeps hot all day.” Also request retention testing after 24 hours and a vacuum leak check. Good suppliers thermos programs in China can tie those results to batch records.
What should I check in a sample before approving production?
Check wall consistency, lid torque, gasket fit, coating adhesion, and leak performance. Fill the sample at 90-95°C, close it, then invert it for 10 minutes and repeat after one hot/cold cycle. If you are sourcing promotional thermos items, inspect logo edges and rub resistance too. For a real factory thermos approval, ask for a cut sample or cross-section photo so you can confirm the vacuum layer and weld quality, not just the outside finish.
Can you support Amazon and retail packaging requirements?
Yes, but you need to share the channel plan early. Amazon FBA needs FNSKU labels, carton dimensions, barcodes, and usually unit/inner/master pack data before production starts. Retail needs shelf-ready packaging, retail warning text if applicable, and a stable drop-test result. A thermos distributor order that ignores this usually loses 1-2 weeks in rework. A good manufacturer thermos team in Zhejiang will align labeling, carton counts, and pallet stacking from the beginning.
What failure causes the most returns?
Leaking lids cause the most visible returns, but vacuum loss creates the biggest long-tail damage because the bottle looks fine until the user tests it. In our experience, 60-70 percent of preventable complaints in thermos bulk orders trace back to lid sealing, decoration chipping, or insulation drift from poor process control. That is why you should require AQL limits, torque specs, and thermal retention tests, not just a nice sample photo from the thermos factory.